Welcome to Prestige Photo's Blog!
Topics include:
Bridal and Wedding Resources
Choosing and Communicating With Your Photographer
Commercial Photography
Events
Making the Most of your Photography Session
Photography Techniques
Sports
Jpeg vs RAW. The Discussion Illlustrated over Niagara Falls
You have probably heard of the "RAW vs JPEG" discussion on the web. A RAW file is a photo that is basically a digital negative, untouched by the cameras software. It is a pristine vision of what the lens saw with no electronic manipulation.
JPEG photos have been processed by in-camera chips to try to figure out what the photographer probably wanted the photo to look like. Usually not a good choice for advanced photographers. RAW, NEF, DNG, whatever your files are named, these are the ones that you want to use with Lightroom, Adobe Photoshop, Capture One, etc. The RAW file allows these programs to flex their editing muscles and show you how they can transform blase images into amazing ones. The software doesn't necessarily add things that aren't in the photo originally, you are just able to use data that in invisibly embedded to enhance it. Check this photo out below. Original RAW photo, shot with a Canon 5D IV with a 24-105mm f4 Mark II:
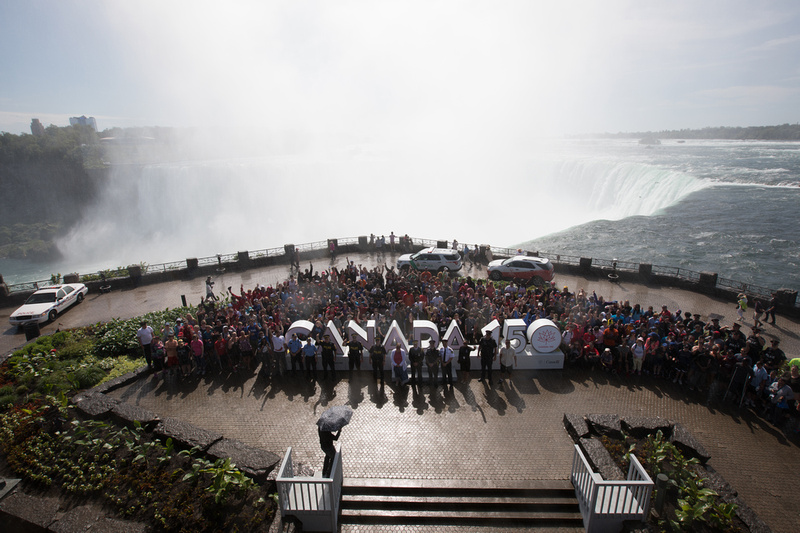

The intent of this exposure was to try to keep as much of the highlights of the mist from Niagara Falls under control. When they're blown out, they are very difficult to try to recover. I'm relying on the Canon 5DIV's sensor to help me lift the shadows. Expose for the highlights, rely on your sensor to bring back the shadows.
Here's the photo with some adjustments:
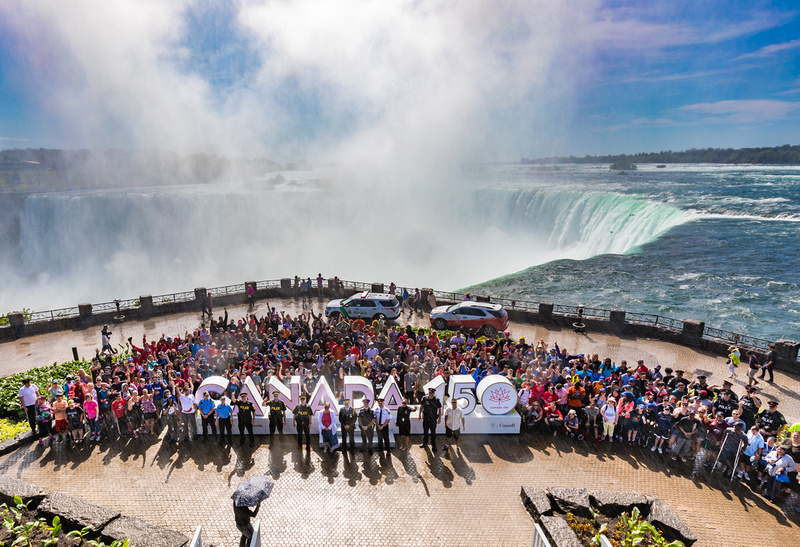

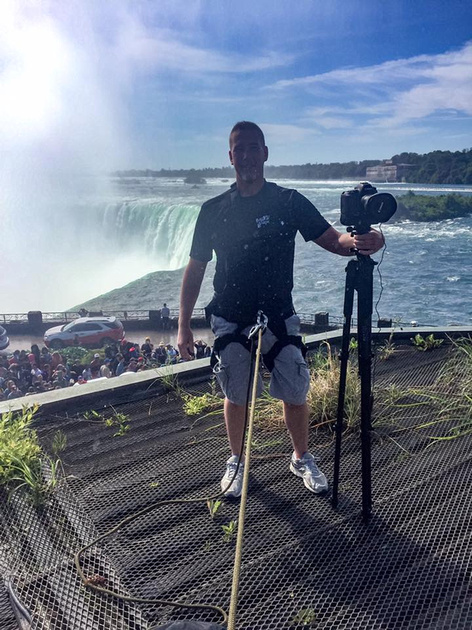
Exposure down a 1/4 stop, highlights crushed (-100), shadows boosted (+100), white and black points set with the ALT key and sliders, clarity 15, vibrance +48, lens corrections and the magical Dehaze at about 43. This starts the groundwork. Those blotches you see over the "C" in Canada" is a raindrop on my lens. I was tethered on the roof of a restaurant so I could lean over for the shot. Niagara Falls is very wet, depending on which way the wind blows. It was pretty crazy how much colour I could bring back and how much detail I could bring out of the mist. The Dehaze tool in this situation is amazing.
Now we export to Photoshop CC:
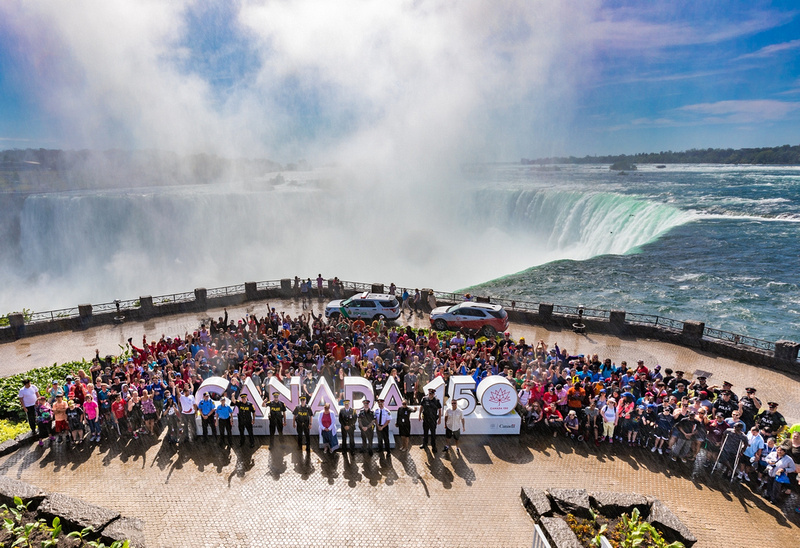
 You'll see here that I have used the Cloning tool to remove the annoying umbrella-boy on the bottom and tourists along the walkway on both sides, to give a cleaner area around the focus group (Special Olympics Athletes and their partners in Law Enforcement). I also used some exposure brushes to brighten up some darker places in the crowd.
This step took hours. I had to clone out the tourists and all the while be careful to keep the cobble stones in alignment. Sometimes, this had to be done one stone at a time..ugh.
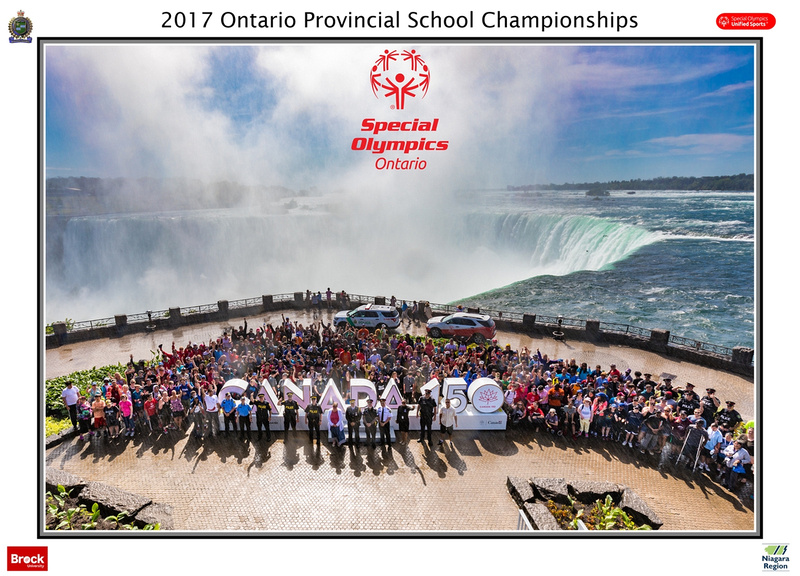

Here, I added some free-hand borders and started plugging in some sponsor logos. Just about finished!
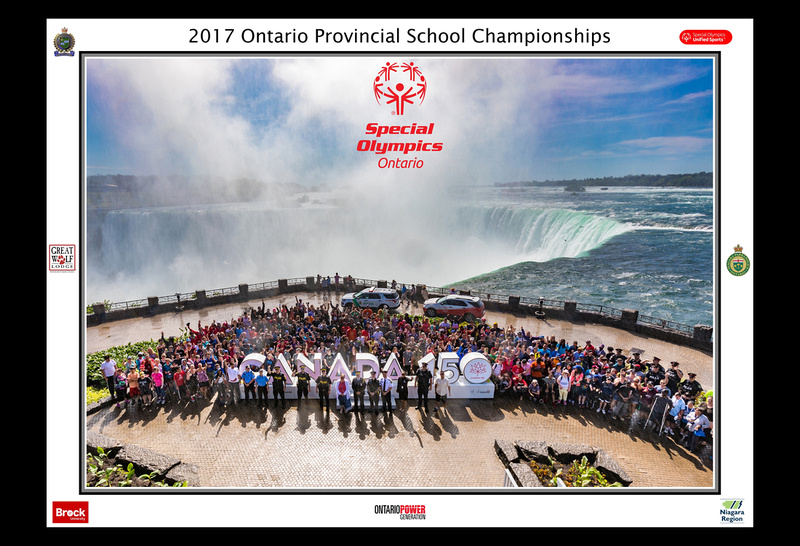

Added the final logos and a large black border. This was done because the client wanted to have the prints "Plak-It" mounted for presentation to corporate supporters. I had instructed the mounting company to just cut off all of the black. I was told that this is a bit of an easier cut for them to do.
Three hours of work and in my opinion, a pretty nice image. BAM.
That, boys and girls, is why photographers aren't cheap. It takes time to learn the skills in both the photography aspects as well as the processing.Thanks for your time!

Jeff / www.PrestigePhotoPro.com
